Color maps
In Imspector the colormap ‘Fire’ is typically selected (‘Fire’ colormap.). Furthermore a variety of built-in colormaps can be chosen (Built-in colormaps.) The active colormap is displayed at the bottom of the measurement window. On the left and right bottom of the colormap, the minimum and maximum gray value is given. In a stack view the colormap is adjusted to the maximum/minimum of the current selection.

‘Fire’ colormap.
Properties of the colormap can be changed using right-click context menu. To access this menu the active colormap has to be right-clicked.
Changing the Colormap
Enter colormap right-click context menu. To change the colormap choose the first entry of the menu ‘Colormap’ and simply select the colormap of choice.
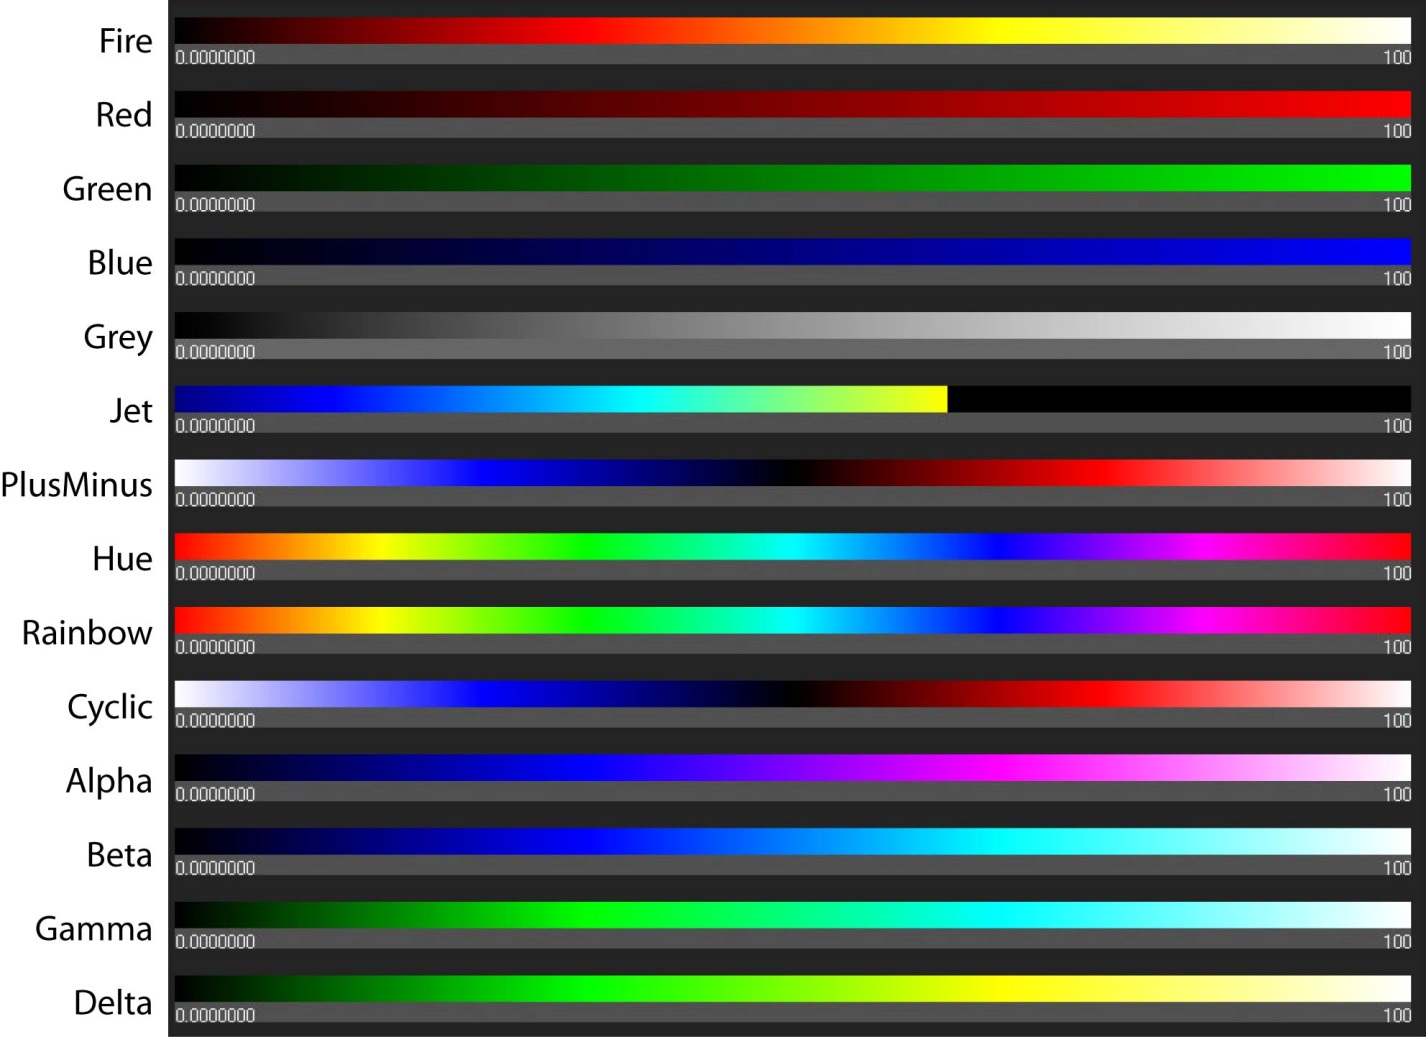
Built-in colormaps.
Copy Colormaps
Colormaps can be copied between measurements using standard Windows shortcuts.
- The colormap has to be selected using left-click and is copied using ctrl + c. Then insert the copied colormap into the new image using ctrl + v
- Alternatively, the colormap can be copied using drag and drop. To this end, the active colormap has to be selected using ctrl + left-click, drag to the new image and drop it.
Locking the Minimum/Maximum Gray Values of the Colormap
Enter colormap right-click context menu. To fix the gray values of the colormap, choose ‘Lock’ and select if you like to fix the maximum or the minimum value.
Note
This option may be particularly helpful during image acquisition.
Linear and Logarithmic Representation of the Colormap
In Imspector gray values can be represented in a linear or logarithmic mode. Typically the colormap is set to a linear mode. To change the colormap mode to logarithmic scale, please enter colormap right-click context menu and click ‘Logarithmic’. If the logarithmic mode is active, a tick is shown in front of this entry.
Adjusting the Colormap Values
The displayed minimum and maximum gray values can be adjusted by different means
- The respective value can be accessed and changed after double-clicking the value at the bottom of the colormap.
- The values can be adjusted to the minimum/maximum gray value of the image or a selected region in the colormap right-click context menu.
- The values can be adjusted to the minimum/maximum gray value of the image or a selected region by pressing F9 / F10. (F9: maximum value; F10: minimum value).
Note
The colormap must be visible at the bottom to do this.
Custom Colormaps
In addition, new colormaps can be created using a colormap editor (‘Colormap editor’ dialog.). To create a custom colormap, the colormap editor has to be opened. To this end, the colormap context has to be opened by right-clicking the active colormap. Then select ‘New’.
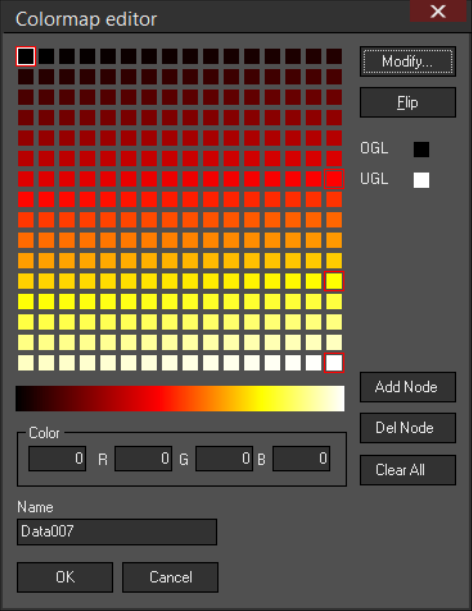
‘Colormap editor’ dialog.
Note
Colormaps can be saved and loaded again.